How to adjust roll forming shears

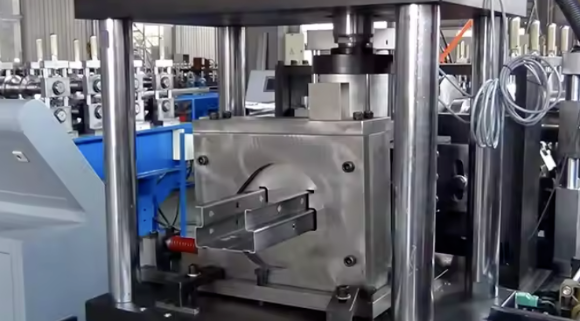
Adjusting roll forming shears requires precision and attention to detail to ensure clean cuts and consistent performance.

Posted on Wednesday, October 2, 2024

1. Ensure Safety Precautions

  • Turn off the power to the roll forming machine.
  • Wear protective gear such as gloves and safety glasses.
  • Lockout/Tagout procedures should be in place to prevent accidental machine activation.

2. Check Blade Condition

  • Inspect the shear blades for wear, nicks, or damage. If the blades are dull or damaged, replace them before proceeding with adjustments.

3. Adjust Blade Clearance

  • Blade clearance is crucial for accurate shearing. The clearance between the upper and lower blades should be checked and adjusted according to the thickness of the material being cut.
  • Procedure:
    • Use a feeler gauge to check the gap between the blades.
    • Loosen the adjustment bolts on the shear assembly.
    • Adjust the blade gap by moving the blades closer or farther apart based on the material thickness. A typical gap is between 5% to 10% of the material thickness.
    • Retighten the adjustment bolts after setting the gap.

4. Align the Blades

  • Proper blade alignment ensures that both the top and bottom blades are parallel, avoiding angled or incomplete cuts.
  • Procedure:
    • Visually inspect the alignment of the blades from the side.
    • Use a straight edge or dial indicator to verify that both blades are level.
    • If misaligned, adjust the blade holders by loosening the mounting bolts and realigning the blades.
    • Retighten the bolts after achieving proper alignment.

5. Set Blade Stroke (Optional)

  • Some roll forming machines have adjustable shear stroke lengths depending on the material length or profile.
  • Procedure:
    • Locate the stroke adjustment mechanism (usually a knob or lever).
    • Adjust the stroke so that the blade travels just enough to complete the cut without excessive movement.
    • Test the stroke by manually cycling the machine to verify the length is appropriate.

6. Check and Test

  • Once the adjustments are made, manually rotate the machine through a cycle to ensure the blades do not bind or interfere.
  • Perform a test cut on a sample of the material to verify the shear operation is clean and accurate.
  • Make additional fine adjustments if needed based on the test results.

7. Maintenance

  • Regularly check and lubricate moving parts of the shears to reduce wear.
  • Periodically inspect blade sharpness and overall shear performance.

Following these steps will help you achieve precise shearing results and prolong the life of your roll forming machine.
Understanding Coil IDs, Mandrel Sizing, and Shear Pin Safety in Uncoilers

Understanding Coil IDs, Mandrel Sizing, and Shear Pin Safety in Uncoilers

Posted on Wednesday, October 1, 2025

Mismatched sizes can lead to machine damage, downtime, and safety hazards — often evidenced by a shear pin failure.

How Coil Tensile Strength Affects Roll Forming and How to Adjust Your Machine

How Coil Tensile Strength Affects Roll Forming and How to Adjust Your Machine

Posted on Wednesday, October 1, 2025

Changes in tensile strength can significantly affect the finished profile, causing misaligned bends, uneven edges, and out-of-spec parts.

Why Paint Cracks on an Embossing Line Running Pre-Painted Coil and How to Prevent It

Why Paint Cracks on an Embossing Line Running Pre-Painted Coil and How to Prevent It

Posted on Wednesday, October 1, 2025

This issue not only affects the visual quality of the product but can also lead to increased scrap rates and customer complaints.

The Most Popular Standing Seam Metal Roof Panels in the U.S. — A Comprehensive Guide

The Most Popular Standing Seam Metal Roof Panels in the U.S. — A Comprehensive Guide

Posted on Monday, September 29, 2025

In this post, we’ll explore what panel styles and sizes are most popular in the U.S